
Article guide
DIY Installation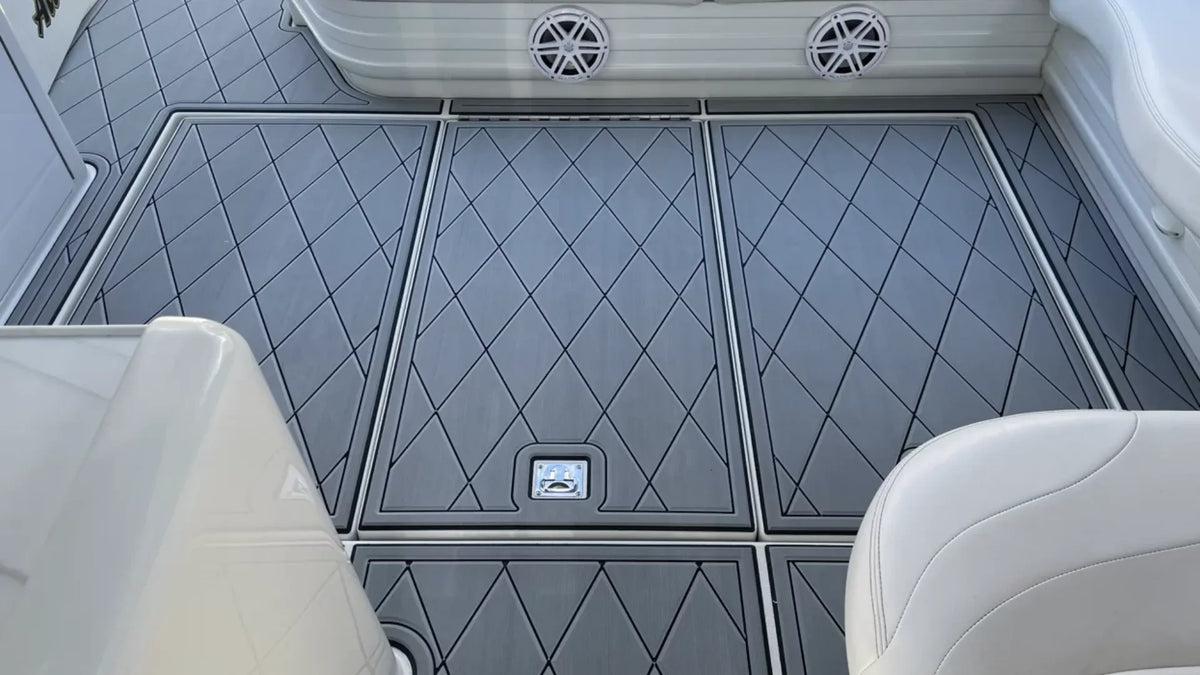
Article guide
DIY InstallationQuick answer: EVA boat flooring should be planned as separate, dry-fitted panels rather than forced into one continuous skin across hatches, moving joints, drains or major deck transitions. Keep seams consistent, preserve functional clearance, align directional patterns before peeling the adhesive liner, and never stretch the foam to make a panel reach.
There is no single seam width that should be copied blindly from every other EVA brand or installation. Foam formulation, panel size, temperature, deck geometry and the specific product system can differ. Use the product instructions for the material you are installing and confirm the entire layout before bonding.
A boat deck is not one flat rectangle. Hatches open, consoles create narrow passages, drains need clearance and large shapes become difficult to align. Dividing the project into sensible panels makes measuring, cutting, installation and future localized repair more manageable.
Do not force panels tightly together or stretch them to close a gap. EVA foam changes dimension with temperature and handling, and an installation can look uneven if one panel is compressed while the next is relaxed.
The correct spacing depends on the specific product and layout. Some manufacturers publish their own minimum gaps for their own pad systems. Those numbers should not automatically be treated as universal specifications for every EVA sheet on the market.
For PoseidonDeck DIY sheets, dry-fit the actual pieces on the boat, keep a consistent planned seam, and preserve clearance around every moving or serviceable feature. If a project requires an exact engineered seam specification, confirm it for the selected product before cutting.
Stretching can temporarily make a piece appear to fit, but it changes the geometry and can create tension after the adhesive bonds. The safer process is:
A hatch is a moving component, not simply another line in the deck. Template the lid and surrounding fixed deck separately. Open and close the hatch through its full travel during the dry fit.
Check:
Good seams follow the geometry of the boat. Practical locations can include the edge of a hatch group, a console boundary, a step transition, a cockpit-to-walkway change or another straight visual line.
Avoid placing a seam only because it minimizes square-foot waste if the result creates a narrow strip, awkward pattern break or difficult installation area. Material efficiency matters, but the finished layout matters too.
Directional patterns make seam planning more important. Mark bow-to-stern orientation on every template and offcut. Before cutting the next panel, check that the visible stripe direction continues the way you intend.
Rotating a template 90 degrees may save material but can make the pattern run across the deck instead of along it. The sheet calculator and layout guide explains why the lowest-area layout is not always the best final layout.
If a panel is wider than the selected sheet, do not hide the problem by creating an unplanned seam after the material arrives. Check the widest point before ordering.
PoseidonDeck standard sheet widths vary by product and can reach 46.2 inches. For a wider deck zone, consider a deliberate multi-panel layout, a wider available sheet, or a verified custom project. The live product selector controls the size available for each color and pattern.
Curved gunwales, cockpit sides and swim-platform edges are common sources of fitment error. A photograph can show the shape but normally cannot define it accurately enough by itself.
Use a full-size template or multiple reference dimensions along the curve. If a custom CAD layout still has uncertainty at one boundary, leaving extra material for final on-site trimming is safer than forcing a guessed curve into the CNC file.
See How to Make a Boat Flooring Template for Curves, Hatches and EVA Foam.
Do not install on a wet, contaminated or unstable surface. Keep the flooring and deck in reasonable working conditions, and avoid an installation where the material is extremely hot, cold or distorted before the final fit is checked. Follow the installation guidance supplied with the selected product.
The deck should be clean, dry and free of wax, oil, silicone, loose coating and old adhesive residue. See the substrate preparation guide before bonding.
Universal sheets work well when the owner is comfortable measuring, templating and cutting the layout. Custom cutting becomes more useful when several panels must coordinate around curves, hatch groups, routed lines or complex deck geometry.
For custom projects, the engineer still needs reliable geometry. Model name and photos help identify the boat, but accurate measurements, a verified drawing, a physical template or another scale-checked source is required for fit-critical boundaries.
Foam dimensions can change with temperature, handling and material behavior. Do not stretch or compress a panel during installation, and follow the guidance for the specific product rather than assuming every brand behaves identically.
No. The hatch lid should normally be treated as a separate moving panel so the flooring does not interfere with opening, drainage, hinges or latches.
Do not force them together. Plan a consistent seam according to the selected product and the actual deck layout, then dry-fit both panels before exposing the adhesive.
Mark orientation on every template, keep the sheets facing the same direction during layout, and compare adjoining panels before cutting or bonding.
Use a full-size template. For custom production, if the curve cannot be verified confidently, leave adequate extra material for final trimming rather than guessing the final edge.
Start a DIY project with PoseidonDeck EVA foam boat flooring sheets, or review the custom boat flooring process for complex fitted layouts.
Understand what closed-cell EVA water resistance means, how water can reach seams, adhesive and substrates, and why a wet-use boat floor is not automatically a watertight installation.
Read moreLearn how substrate condition affects EVA boat flooring installation on fiberglass, aluminum, sealed plywood and painted decks, and when the surface should be repaired first.
Read morePlan EVA foam center console boat flooring by helm, cockpit, bow, transom and swim-platform zones, with measuring, hatches, drainage, templates and DIY installation guidance.
Read more


Share:
Sailboat EVA Foam Flooring: Cockpit, Cabin & Faux Teak Guide