
Article guide
DIY Installation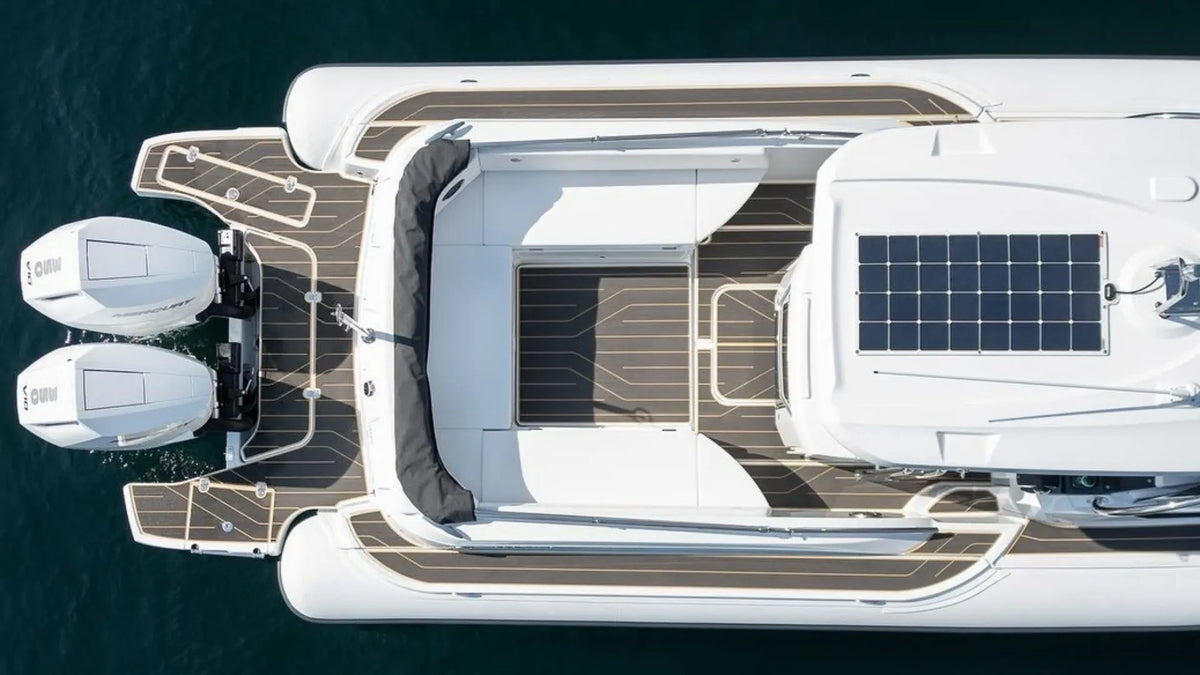
Article guide
DIY InstallationUpdated August 2026
Replacing worn bass boat carpet with EVA foam can create a cushioned, easier-to-inspect deck surface, but the project succeeds only when the old carpet and unstable adhesive are fully removed and the underlying deck is structurally sound.
Bass boats are more complex than open flat decks. Casting platforms, hatch lids, rod lockers, consoles, seat bases and narrow transitions turn flooring replacement into a panel-by-panel project. The most important work usually happens before the first EVA sheet is installed.
This guide covers the complete conversion process. For a material-only decision, first read EVA foam vs marine carpet boat flooring. For general fishing-boat product selection, use the fishing boat flooring buying guide.
Yes, many bass-boat decks can be converted from carpet to adhesive-backed EVA foam when the exposed substrate is stable, dry, clean and compatible with the selected adhesive. EVA must not be installed directly over carpet, loose carpet backing, deteriorated glue, soft plywood, delaminated fiberglass or active corrosion.
EVA foam is a non-structural surface covering. It cannot repair a weak casting deck, leaking hatch, damaged stringer system or rotten plywood. Stop the cosmetic project and arrange appropriate repairs when the deck moves, flexes unusually, feels soft or shows active water damage.
| Decision factor | New marine carpet | EVA foam conversion |
|---|---|---|
| Original appearance | Preserves a traditional bass-boat look | Creates a modern deck-pad appearance |
| Surface feel | Soft fabric pile | Cushioned foam with a defined texture |
| Fishing cleanup | Debris can settle into fibers | Residue stays visible on the exposed surface |
| Layout method | Often fitted as broad carpet sections around lids and furniture | Usually installed as planned panels for casting decks, lids and cockpit zones |
| Future local repair | Carpet patches may show pile and wear differences | A planned EVA panel may be replaced separately, subject to color and pattern availability |
| Installation requirement | Clean deck and compatible carpet adhesive or fastening system | Clean, dry, stable and adhesive-compatible deck with firm roller pressure |
Choose based on the complete project rather than appearance alone. Removing seats, hinges, latches, trim and old adhesive may require more labor than installing the new surface.
Do not calculate coverage from boat length. Sketch and measure each actual panel.
| Zone | Planning issue | Recommended approach |
|---|---|---|
| Bow casting deck | Large visible area with multiple hatch openings | Establish one pattern direction and divide the deck into controllable sections |
| Rear casting deck | Seat bases, lids and engine-access areas | Keep service access and hardware clearances functional |
| Hatch lids | Edges, hinges, latches and tight gaps | Template every lid individually and test full movement before bonding |
| Cockpit floor | Foot traffic, drainage and seat pedestals | Keep drains open and avoid thin pieces around mounting points |
| Console and helm | Pedals, wiring, controls and limited hand access | Use smaller panels that can be aligned without disturbing controls |
| Steps and transitions | Toe clearance and exposed edges | Use simple shapes with rounded or protected corners where practical |
| Rod and storage lockers | Lid clearance and gasket compression | Confirm that added flooring thickness does not prevent closing |
Follow the boat manufacturer's guidance when removing seats, electrical equipment or fuel-system-adjacent components. Disconnect and protect electrical power when the work requires it. Provide ventilation and follow the labels for every cleaner or adhesive-removal product.
Good documentation prevents hardware from being returned to the wrong hatch and helps preserve lid alignment.
Work in manageable sections. Pulling too aggressively can remove weak coatings, lift fiberglass skin or damage plywood fibers.
Old carpet is not automatically an accurate final template. It may have stretched, shrunk, torn or wrapped around edges differently from the planned EVA layout.
The goal is not merely to make the surface look cleaner. The remaining layer must be stable enough for a new adhesive-backed material.
Aggressive scraping, grinding or solvent use can damage the boat. When the residue is difficult to identify, use a marine repair professional or the boat manufacturer's recommendation rather than guessing.
For a structured sequence covering controlled panel removal, adhesive-residue cleanup, substrate-specific precautions and final readiness checks, use the EVA flooring removal and adhesive-residue guide. Carpet glue and EVA backing are not identical, so adapt each method to the actual residue and deck material.
Carpet can hide damage. Inspect before ordering final flooring quantities.
| Finding | What it may indicate | Action before EVA |
|---|---|---|
| Soft or spongy plywood | Moisture damage or loss of structural strength | Repair or replace the affected deck structure |
| Cracks or separated fiberglass layers | Delamination or impact damage | Obtain appropriate fiberglass repair |
| Loose paint or powdery coating | Unstable bond surface | Remove or repair the failed coating |
| Corrosion or white oxidation | Aluminum surface deterioration | Prepare and repair using an aluminum-compatible method |
| Standing water or wet wood | Drainage or leak problem | Correct the source and dry the structure |
| Fuel odor, damaged wiring or unsafe hardware | Potential safety issue | Stop work and arrange qualified inspection |
Do not use foam to conceal a deck problem. Flooring should be the final surface step after the boat is safe and stable.
For most bass-boat projects, universal sheets work when the owner can template and cut each deck panel. A custom route may be more efficient when the boat has many closely fitted lids, routed borders, logos or complex multi-piece alignment.
| Project goal | PoseidonDeck starting point | Planning note |
|---|---|---|
| Versatile casting deck and cockpit | Diamond Pattern EVA Foam Boat Flooring | Defined pattern works well across separate bass-boat panels |
| Fishing and outdoor styling | Camo Diamond EVA Foam Boat Flooring | Plan color placement across lids and adjoining deck sections |
| Clean simplified appearance | Solid Color EVA Foam Boat Flooring | Accurate gaps and edge shapes become visually important |
| Traditional directional marine look | Faux Teak Stripe EVA Foam Boat Flooring | Every lid and panel must follow the same stripe direction |
These are universal cut-to-fit sheets rather than verified model-specific kits. Confirm actual sheet dimensions, thickness, backing, color and layout before ordering. Review the broader EVA foam boat flooring collection for current options.
Hatch-lid pieces should not bridge moving gaps or cover service fasteners that need future access.
Use the boat deck measurement guide for verification dimensions and the full-size template guide for curves, lid orientation and hardware locations.
Add the measured area of all selected panels, but also confirm that every individual template fits inside the available sheet dimensions. Gross square footage alone can underestimate the number of sheets when wide casting-deck pieces or directional patterns create unusable offcuts.
Use the EVA sheet calculator and layout guide to test panel nesting, then use the cost and budget guide for the full project estimate.
A full dry fit is essential because adhesive-backed EVA is difficult to reposition after contact.
For blade control, curves, hatch openings and edge finishing, follow the complete EVA foam cutting guide.
For the complete workflow, read How to Install EVA Foam Boat Flooring. If you are comparing the standard backing with a supplemental 3M option, review the PoseidonDeck adhesive vs 3M adhesive guide before applying anything.
Do not cover moving hinge joints. Keep latch access clear and confirm the added material does not change lid closure.
Plan whether the foam stops around the base or sits beneath removable hardware. Maintain secure fastener engagement and avoid trapping loose foam at a high-load mount.
Check full travel and gasket compression. Added thickness on both a lid and surrounding deck can reduce clearance.
Do not cover drains, gutters or water-routing gaps. EVA does not correct an existing drainage problem.
Hooks, knives, trolling-motor hardware and dragged anchors can cut or gouge foam. Create storage habits that protect the new surface.
Review common mistakes that damage EVA boat decking before using the finished boat.
The complete cost depends on more than the new flooring. Budget for:
A universal-sheet DIY conversion and a professionally templated custom kit are different projects. Compare total labor, repair and finishing requirements instead of only flooring price.
Textured EVA can improve footing compared with a smooth deck, but no surface is slip-proof. Water, sunscreen, soap, fish residue, mud and wear can reduce traction. Use the EVA deck maintenance and cleaning guide for routine care.
No. Remove the carpet, backing and unstable adhesive, then inspect and prepare the exposed deck.
No. Soft plywood, delamination or structural movement must be repaired before any cosmetic flooring is installed.
It can provide rough reference shapes, but it should not be the only final template because old carpet may be stretched, shrunk, wrapped or torn.
Diamond pattern is the most versatile starting point. Camo suits fishing-focused styling, solid color creates a simplified look and faux teak requires careful directional alignment.
It can cover suitable lid surfaces when hinges, latches, gaps, drainage and closing clearance remain fully functional.
Identify the substrate and use removal methods compatible with that material. Test first and avoid aggressive scraping or solvents that can damage plywood, fiberglass, aluminum or coatings.
Not always. Universal sheets work for owners who can template and cut individual panels. Custom work is more useful for numerous tightly fitted lids, routed borders, logos or complex alignment.
Closed-cell EVA limits water absorption into the foam itself, but the installed system also includes edges, seams, adhesive and the underlying deck. Proper drainage and preparation still matter.
No flooring is slip-proof. Texture can improve footing, but contamination, standing water and wear can reduce traction.
A separately planned panel may be replaced, but color and pattern can differ because of aging or future product availability. Keeping spare material can help.
Browse PoseidonDeck EVA foam boat flooring for universal cut-to-fit sheets. For a bass boat with numerous fitted lids or an unusually complex layout, send clear deck photos, measurements, year and model through the PoseidonDeck contact page.
Understand what closed-cell EVA water resistance means, how water can reach seams, adhesive and substrates, and why a wet-use boat floor is not automatically a watertight installation.
Read moreLearn how substrate condition affects EVA boat flooring installation on fiberglass, aluminum, sealed plywood and painted decks, and when the surface should be repaired first.
Read moreCompare pre-cut, universal and custom Sea-Doo Spark or Trixx deck mat options. Learn how to measure, template, cut and install EVA foam without assuming model-specific fit.
Read more


Partager:
EVA Foam vs Marine Carpet Boat Flooring: Which Should You Choose?
Boat Flooring Kits vs EVA Sheets vs Custom-Cut Mats: Which Should You Buy?